
Tag: cookingdemo

Spicy Prawn Salad
Sun’s out in Dublin, and it’s beautiful! Such a change from yesterday. Maybe you’re hosting or going to one last summer BBQ? Or just don’t feel like cooking a massive meal?
This is a super quick and easy salad recipe, but there is a lot of flavor. It’s a colorful and bright dish, but the marinade really steals the show! It’s a good go-to for get togethers. Although it’s only August, this would make for a great, and very refreshing, starter at Christmas time.
The prawns are from Castletownbere, where the seafood is unreal. If you ever find yourself in West Cork, picking up some seafood is a must! Top chefs all over Ireland use, and give high praise to, West Cork’s seafood.
I made this Spicy Prawn Salad at my cooking demo earlier this month, and it was such a hit! Thanks again for those who came out.
CARMEL’S SPICY PRAWN SALAD
Serves 5-6
INGREDIENTS:
6 ears of fresh corn
1 lb cooked prawns
10 ounces cherry tomatoes
1 red bell pepper
1 teaspoon cumin powder
1 teaspoon turmeric
1 teaspoon paprika
¼ cup tablespoon olive oil
2 cloves of garlic, minced
sprinkle of chili flakes
2 tablespoons parsley
2 tablespoons lime juice
2 tablespoons white vinegar
salt and pepper
METHOD:
Marinade the prawns for at least 45 minutes(the longer the better!). Marinade is: olive oil, cumin, turmeric, paprika, garlic and chili flakes. While marinating the prawns, cook the corn. Place the corn in a saucepan and cover with water. Bring to boil, then drain and rinse. Set aside to cool. Whisk together parsley, lime juice, vinegar and salt and pepper. Put corn, prawns, tomatoes, and bell pepper in bowl. Pour the parsley dressing over. Serve alongside BBQ and enjoy!

COOKING DEMO NEXT WEEK
In West Cork next week?! I am giving a cooking demonstration on Bere Island! It’ll be at 5pm in the Community Center.
There’s a lot of fun activities on Bere Island happening over the next week, check out the line-up:

A Quick Catch-Up
Helllloo!
I spent the last week in West Cork, and it allowed for a much needed internet/social media/blog detox apart from a couple of photos posted to Instagram and Facebook. As a blogger, it is important, and healthy, to take a step back from the internet every once in a while. I got to go to a childhood friend’s wedding(the bride looked fabulous!) and spend time with my parents and twin sister. It was a week well spent with family and friends!
I did a tiny bit of recipe testing for my upcoming EBook, which I am so excited about! I’m writing, editing, and photographing it myself…which has had it’s challenges, but I am incredibly proud. It’ll showcase some of my more popular recipes from my blog, as well as a couple of EXCLUSIVE (oooOOhh) ones! It’ll be available next month!

I feel very refreshed and a little more refocused. It’s that sea air down in West Cork that does that! How gorgeous was Bere Island looking earlier this week? The weather was sunny, and I look like a tomato, but it was such a great week.
Who will be heading down to West Cork the first week of August(Regatta Festival)?! I’ll be giving a cookery demo–more details to follow!!

Hot off the press! My Cuckoo Magazine Interview!

Wahhhooo! It’s almost the weekend, my parents and sister are visiting, AND I HAVE AN INTERVIEW OUT!!
Click the link below to read a little about me, my blog, those I look up to, and what goals I have planned for the future!
CUCKOO MAGAZINE INTERVIEW
I think the hashtags GIRLBOSS or GOALDIGGER are fitting, no?
Homemade yogurt with a blackberry coulis
Making yogurt at home can seem quite daunting. It’s certainly a labor of love, but it’s incredibly rewarding! As a snack, in smoothies, or on pancakes, you’ll be so happy you made your own! This homemade recipe can also make a great frozen treat-line a bread tin with cling film, just pour in the yogurt, and set overnight!
The equipment you’ll need:
A HEAVY saucepan
Thermometer (one that can clip to the side of the pan makes things easy!)
Spatula
Whisk
Small measuring cup
Ingredients:
½ gallon of milk (2% or whole is best!)
½ gallon of yogurt (with active cultures)
- Heat the milk.Pour the milk into the heavy saucepan and set over medium to medium-high heat. Warm the milk to right below boiling, about 200°F. Stir the milk gently as it heats to make sure the bottom doesn’t scorch and the milk doesn’t boil over.
- Cool the milk.Let the milk cool until it is just warm to the touch, 112°F to 115°F. Stir occasionally to prevent a skin from forming.
- Thin the yogurt with milk.Scoop out about a cup of warm milk with a measuring cup and add the yogurt. Whisk until smooth and the yogurt is dissolved in the milk.
- Whisk the thinned yogurt into the milk. Pour the thinned yogurt into the warm milk while whisking gently.
- Transfer the pot to the (turned-off) oven. Cover the Dutch oven with the lid and place the whole pot in a turned-off oven — turn on the oven light or wrap the pot in towels to keep the milk warm as it sets (ideally around 110°F).
- Wait for the yogurt to set. Let the yogurt set for at least 4 hours or as long as overnight — the exact time will depend on the cultures used, the temperature of the yogurt, and your yogurt preferences. The longer yogurt sits, the thicker and more tart it becomes. If this is your first time making yogurt, start checking it after 4 hours and stop when it reaches a flavor and consistency you like. Avoid moving or stirring the yogurt until it has fully set.
- Cool the yogurt. Once the yogurt has set to your liking, remove it from the oven. If you see any watery whey on the surface of the yogurt, you can either drain this off or whisk it back into the yogurt before transferring to containers. Whisking also gives the yogurt a more consistent creamy texture. I love to add vanilla beans that I’ve scraped out of the pods-I just fold them in!
Transfer the to storage containers, cover, and refrigerate.
Homemade yogurt will keep for about 2 weeks in the refrigerator.
BLACKBERRY COULIS
My fondest memories are those spent on Bere Island, during the summertime. There’s really no place quite like it in the sun! Amongst the wild herbs and plants that grow here, are blackberries. One of the activities we would do when were younger, was go on long walks and pick blackberries along the way, either to be made into jam or as a healthy snack!
This coulis goes great with homemade yogurt or ice cream…you’ll probably be eating it with a spoon!
What you’ll need:
250g blackberries
50 g caster sugar
1.2 tspn vanilla extract
Put the blackberries and sugar into a saucepan with 2 fl oz of water. Bring to the boil, and then let simmer. Stir in the vanilla. Remove from stovetop, and let the mixture cool. Once room temperature, blitz all the ingredients in our food processor. Strain through a sieve-be sure to use a ladle or spatula to really rub the blitzed mix to get as much out of it as you can! Keep in an airtight container, like a jam jar, and it should last anywhere from 3 weeks to 3 months.
Wild garlic and cheddar power scones
Guests will be certainly be impressed with the foraged ingredient. I load these bad boys up with heaped tablespoon of linseeds, bee pollen, sprouted buckwheat to get those extra gains. I like to use my smallest scone cutter, and top soups with mini scones!

Ingredients:
225g self-raising flour (I used wholewheat)
1 level tsp baking powder
50g butter
100g grated cheddar cheese
30g wild garlic leaves, finely chopped
1 egg
milk
Preheat the oven to 200C. Mix the flour and baking powder in a large bowl, rub in the butter until it looks like breadcrumbs. Stir in the cheese and wild garlic. Beat the egg in a small bowl, or mixing jug. Add that to the flour mixture. Then add in milk, just less then a teaspoon at a time to bring it all together as a soft dough. Dust your countertop with flour. Gently pat or roll out the dough into a round about 2cm thick. Cut out your scones, place ona baking tray, and brush with milk. Bake for 10-12 minutes, until golden brown. Remove from oven, and enjoy slathered with butter while still warm, or as a side to soup.
Courgetti with Wild Garlic Avo Cream
Growing your own vegetables is one of the most satisfying hobbies you could take up. We grew our own corn at Ballymaloe, and there was such a a sense of being a champion seeing those stalks full grown! Courgette is something I use a lot of, and maybe one day I’ll find a little patch and grow some! This is a quick supper or lunch idea, and all beneficial. This is going to be my favorite summer dish!
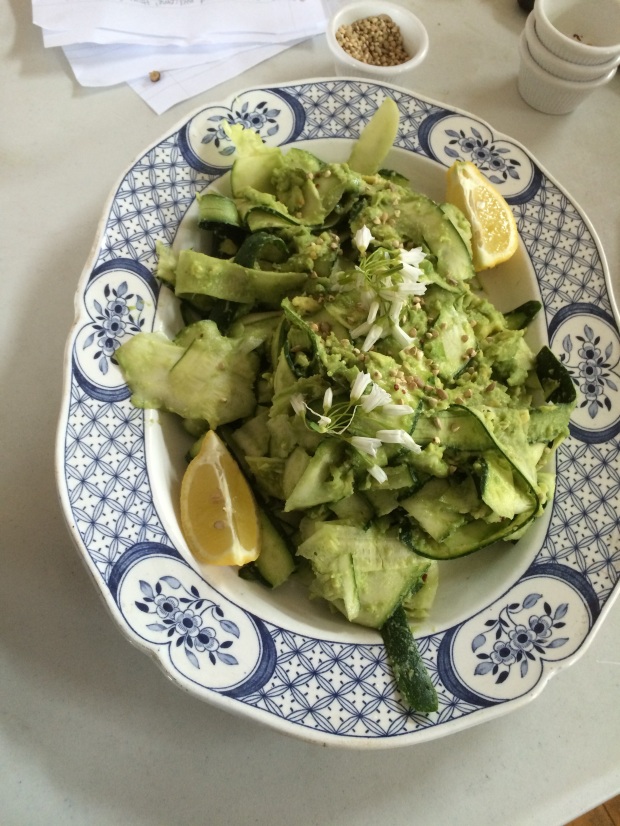
To make the courgetti (or zoodles):
Typically a courgette per person.
The easiest way is to use a spiralizer. If you don’t own one, just peel the courgette, as you would a carrot, with a peeler. Then slice as thin as you can with a sharp knife.
Set to the side and make the avocado cream.
AVOCADO WILD GARLIC CREAM
This sauce combines two of my favorite ingredients: avocado and wild garlic. It’s a light alternative to traditional pasta. I also like to use this sauce on toast in the morning, for a breakfast of champions! So easy, and perfect for those summer nights just around the corner!
Ingredients:
1 avocado and half of another
3-4 stalks of wild garlic, chopped finely
Tablespoon of lemon juice
Chili flakes
Salt and pepper
Slice open the avocado. Scrape it into a mixing bowl. Without a potato masher, mash until smooth. Add the rest of the ingredients, and mix through. Add your zoodles to the bowl, and give a good stir. Great as a main, or side to salmon or chicken!
First live demo done!
Thank you everyone who came out to my live demo this past Sunday! A huge congrats to Helen and Niamh for organizing a fabulous Bealtaine festival! And thank you to all the speakers who shared their stories with us. It was a wonderful, and such unique weekend to be a part of.
It was my first live demo, and yeah I was a ball of nerves the size of Texas, but it went well!I wanted to give my first demo on Bere Island, because it’s where I started writing and photographing my blog. There was a big crowd, about 30, much bigger than I anticipated. Once I got a little more comfortable and my nerves calmed, it was a fun hour! So I’ll be publishing my recipes over the next couple of days, so stay tuned!
Thank you again for those who attended. Hope you learned something new, and are inspired to use what’s on our front doorstep here in West Cork!
Coming up on the blog this week:
NETTLE SOUP
WILD GARLIC AND CHEDDAR SCONES
COURGETTI WITH WILD GARLIC AVOCADO CREAM
HOMEMADE YOGURT AND A BLACKBERRY COULIS
YYYYUUUUMMMM!!
It is certianly not the last demo I’ll be doing, so stay subscribed!
Demo this Sunday!
What are your weekend plans?
Mark your calendars: the Celtic Festival of Bealtaine on Bere Island this May bank holiday weekend!
I’m giving a cookery demonstration on Sunday at 1pm, and it’s sure to be YUMMY! You’ll walk away with a print-out of my recipes, and try some samples!
All my recipes are going to be guilt-free, and the natural ingredients can be sourced from your back yard!
Details below, and hope to see some of you there:
